
Our Jimny Build - Part 1
- sheepishoverlander
- Jul 4, 2023
- 3 min read
Building a Jimny into an overlander.

With the popularity of the Jimny platform being so great at the moment, and to answer the questions we get asked all the time. We will be doing a series of posts about how we’ve converted our Jimny Gen 3 from being stock on the showroom floor to our little mountain goat it is now.
This post will cover our first two mods we made. The steering damper and our rear floor board.
The Jimny is very light on the steering which is a great bonus, however when off-roading, the wheel can sometimes snap back too fast. A steering damper helps to control this as it is a shock absorber which is fitted to the steering arms. It also reduces the amount of feedback from minor bumps on the road surface. We had always planned on lifting the Jimny and maybe even fitting bigger tyres and such modifications are always complemented by a steering damper.
We purchased our steering damper from Zombie Offroad in Cape Town and had it couriered up to us in Johannesburg. The installation was super simple and straight forward. Hendri from Zombie Offroad even includes some instructions and photos for reference if you need it. Total time to install – about 10-15 minutes.
The end result was what we had hoped for. A stiffer, slightly heavier steering which doesn’t jerk around too much making it feel a lot more stable on open road as well.


The next modification was something that we value even five years later. Our flat loading board in the back. The Jimny does have folding rear seats but considering that we do not have kids we could make better use of the space available.
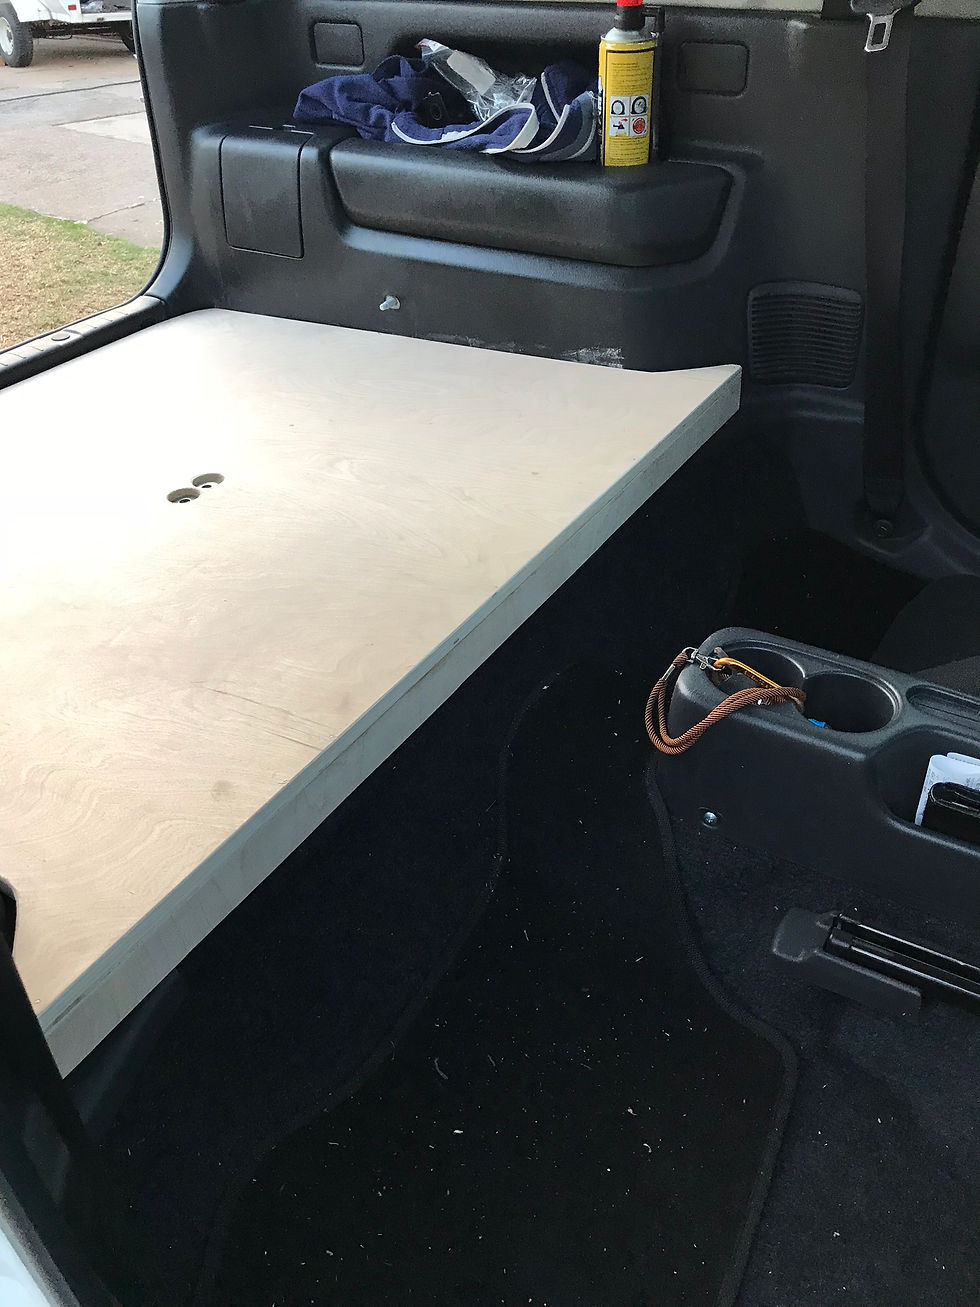
Step one was to remove the rear seats, seatbelts & brackets and see what we had to work with underneath. Once that was done, we used NAD, a form of CAD (Newspaper Assisted Design), to make a template of the floor.
Once the template was done, we sourced our materials. 15mm Birch Plywood, 3mm Chemical resistant neoprene and a few metres of soft touch automotive carpet.
With the template placed on the wood, the cut began! After the main cut was done, we test fitted the board to see where to make the access hatch for the vehicle jack, wheel spanner etc. Cut the access panel out and then made the front support. Those of you with a Jimny will know that the floor is not level and gently slopes towards the front. So, to ensure a level loading space you need to include a front piece to the board behind the front seats as seen in the picture below.


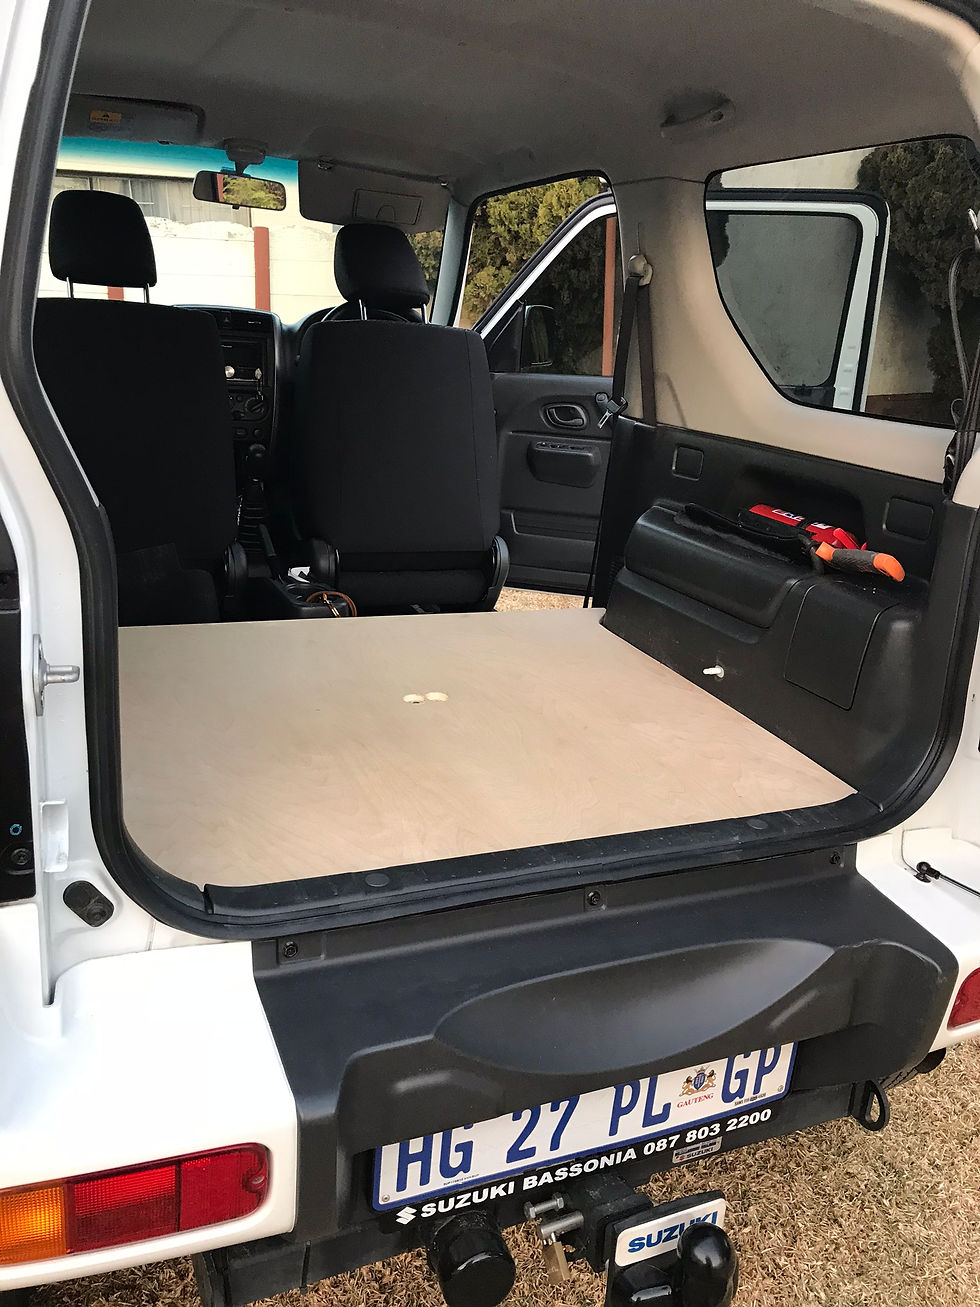
Now that our board was made and it fitted in perfectly, a double and then triple check of the mounting points was made. We used the existing seatbelt threaded holes as we knew this would be the most secure. We drilled the holes and made relief cuts as well so that the bolt heads were recessed and you could still fit a socket in to fasten or loosen them.

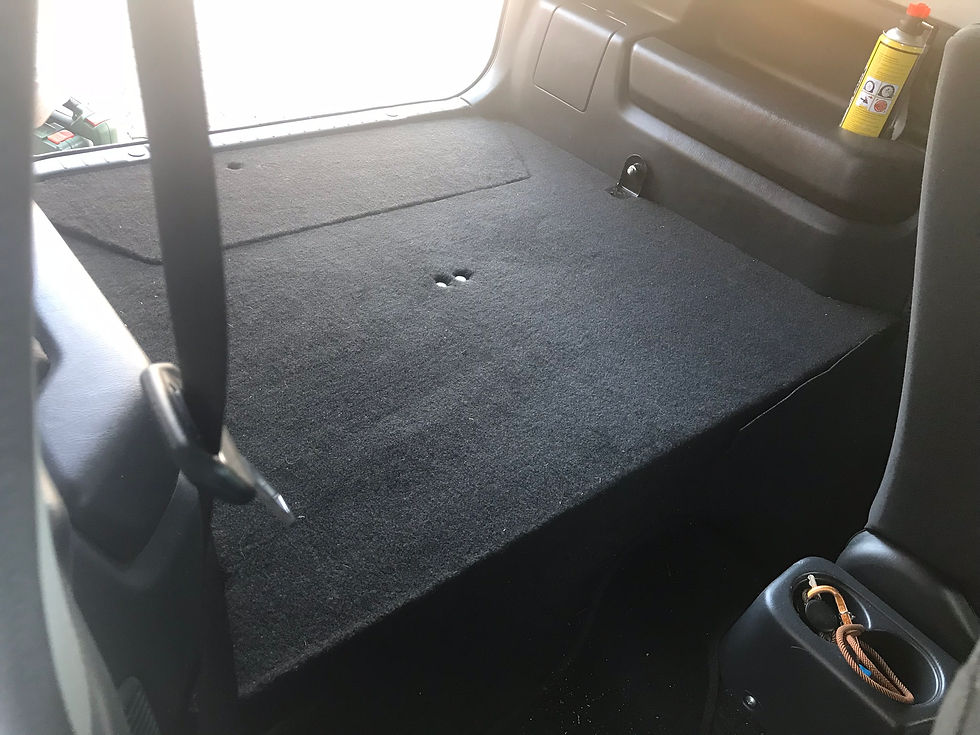
The last step and probably the most tedious, was the carpeting. I knew the bare carpet on wood would eventually rub through. Also, any accidental spills or messes could be absorbed into the wood. In order to try mitigate these two issues and also to give a bit of cushion to the board, we put 3mm neoprene on the board and then carpeted over it. We were very happy with the results but more so with the practicality.


This is by far our best modification yet! This is also something that can benefit Gen 4 owners too. I know their seats do fold better than the Gen 3 and have textured plastic but if you don’t need the seats, you can gain quite a bit of volume and packing space by doing a similar modification.
The board also gives you options to expand. You can add fridge tie down points or even a fridge slide, drawer system, other lashing points and really enables you to go as far as your imagination will allow.


As you can see below we have made the most of the extra space available.


Comments